Easily customize your photos by adding & removing borders on your photos. Follow these simple steps to enhance your design.
Adding a Border to a Photo
1. Click on the photo you want to add a border to.
2. In the Photo toolbar that appears below the photo, click the Edit icon.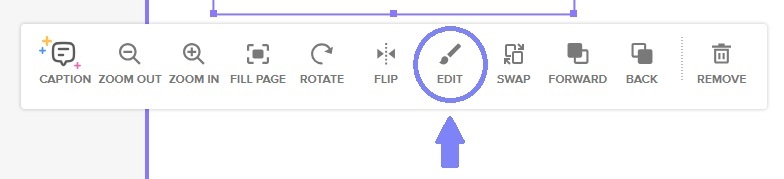 3. A new set of icons will appear, click Border.
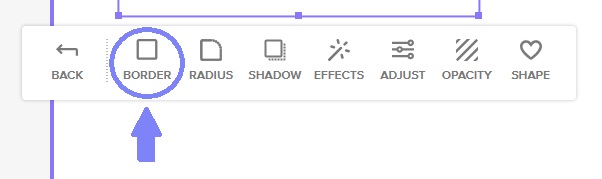 4. In the Border tab, adjust the width/thickness of the border by: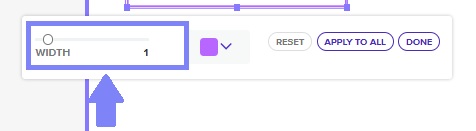
- Dragging the slider (circle) to the right to increase and left to decrease
5. Customize the border color to match your design by clicking on the colored square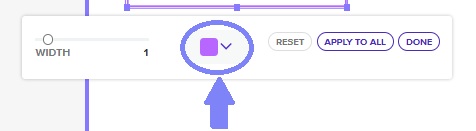
6. Once you've finalized your border width & color you can select between two different saving methods:
Option 1: Apply border to all: click "Apply to All" to apply the same border thickness and color to all photos in a two-page spread.
Option 2: Click "done" if you'd like to set the changes you made to that specific photo ONLY.
✔ Apply to All: Want a uniform look? Click "Apply to All" to apply the same border thickness and color to all photos in a two-page spread. 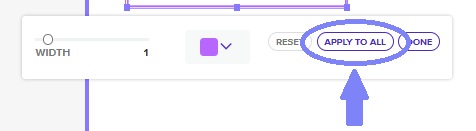
Removing a Border
1. Click on the photo where you want to remove the border
2. In the Photo toolbar that appears below the photo, click the Edit icon.
3. A new set of icons will appear, click Border
4. In the Border tab, adjust the width/thickness of the border by
* Dragging the slider (circle) to the right to increase and left to decrease OR clicking "Reset"
✔ Removing Borders: Click "Reset" to remove the border from the selected photo (this does not remove borders from all photos on the spread). 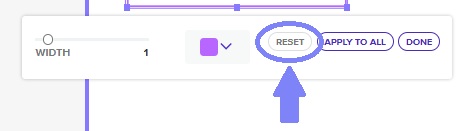
💡 Pro Tip: Experiment with different border colors and thicknesses to add a polished touch to your design!