Uploading photos from your Mac is quick and easy! Whether your images are saved in a folder or your Photos app, you can add them to your Mixbook project in just a few clicks.
🎥 Watch it in action: Learn how in our Mixbook Studio Essentials video tutorial below.
Steps to Upload Photos from Your Mac
- Start or open your Mixbook project.
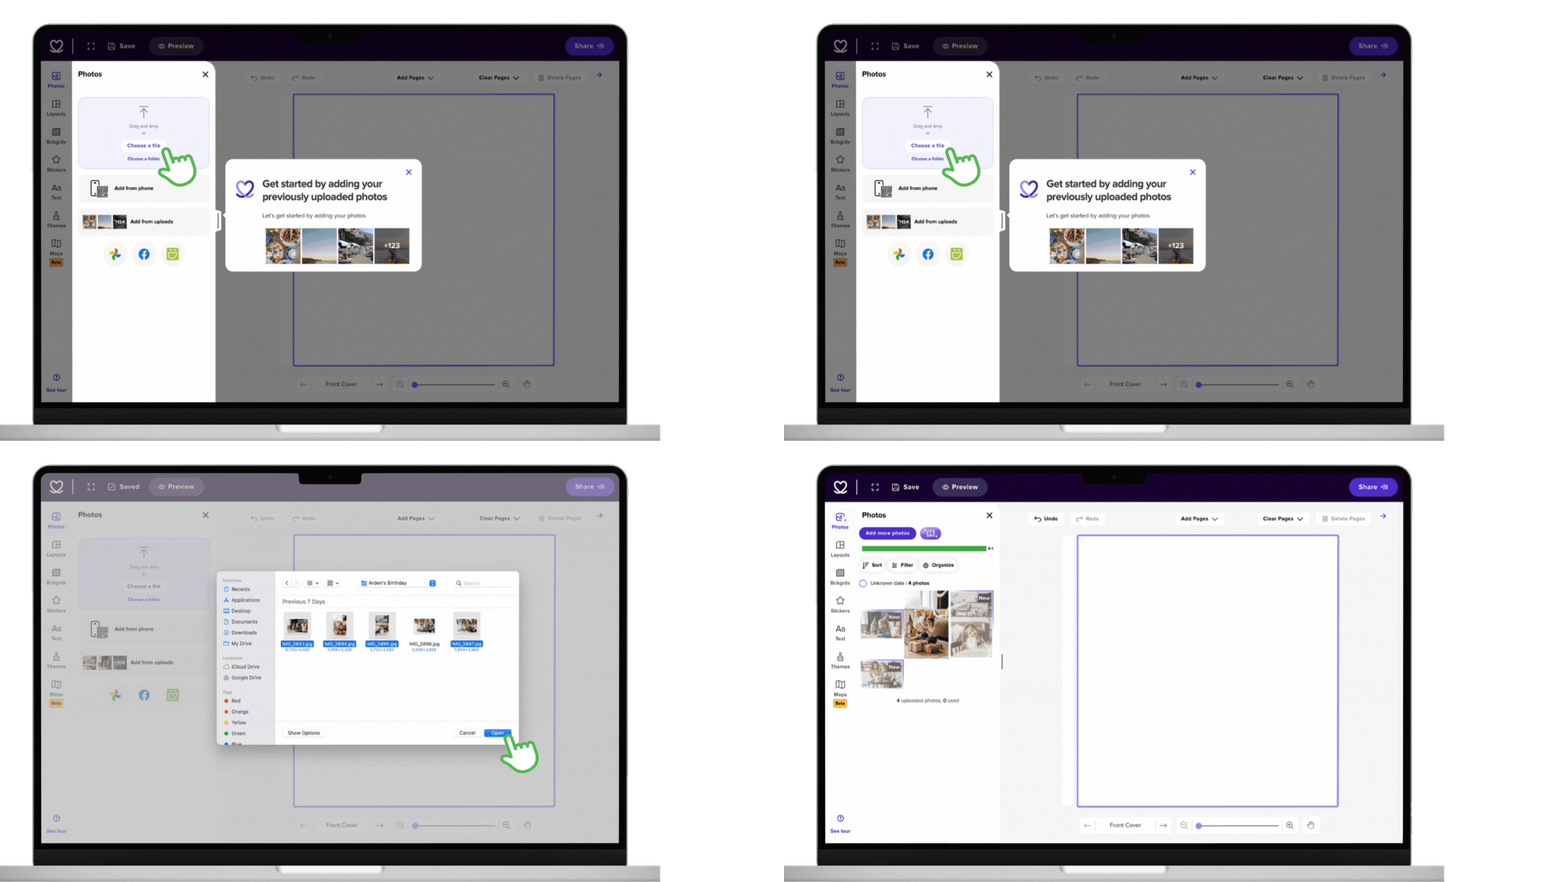
- Click “Photos” in the left panel of the Mixbook Studio.
From here, you can:
Drag and drop photos directly from your Mac, or
Click “Choose a file” or “Choose a folder.”
A window will open displaying your computer files.
Navigate to where your photos are stored.
Select the photos you’d like to upload, then click “Open” to begin uploading the selected photos.
To upload an entire folder, select the folder and click “Open.”
✨ Tip: Once uploaded, your photos will appear in the Photo Tray on the left side of the Mixbook Studio— ready to drag, drop, and start creating!
Uploading from the Photos App
If your images are stored in the Photos app, you can upload them without exporting them first. Here's how:
- In the upload window, scroll to the bottom of the folder list.
- Click "Photos" under the "Media" section.
- Select the images you’d like to upload.
💡 Pro Tip: Use the keyboard shortcut "Command + A" to select all photos in a folder for faster uploading!