Changing Book Size, Paper Type & Cover at Checkout
✔ At checkout, you can select a different book size, paper type, or cover option before placing your order
✔ If you choose a larger or smaller size than your original project, the design will automatically scale to fit the new dimensions.
✔ Available book sizes at checkout depend on your project's shape and orientation.
✔ Available paper and cover options depend on your book size, number of pages, and shipping location.
📌 Note: Orientation (landscape, portrait & square) must be selected prior to creating your project. Furthermore, changing Book Size, Paper Type & Cover cannot be done within the studio and can only be done at checkout for book projects. Additionally, if you are unable to find the preferred size at checkout, double-check the shape or orientation of the project and keep the information below in mind:At this time, it is not possible to change the size in the studio for book, card and calendar projects, this can only be done at checkout.
Shape and Available Sizes (depending on location and book type)
- Square = 6x6", 8x8, 10x10", 12x12"
- Landscape = 8x6", 11x8.5", 14x11"
- Portrait = 8.5x11"
Below is what you will see during checkout (on Desktop):
Via Desktop
Changing Book Orientation/Shape
If you'd like to change the book orientation/book shape (square, landscape or portrait) there are a few ways to make this adjustment prior to creating your Mixbook.
Please note, portrait is only available today in the size 8.5 x 11.
Before Selecting Your Template:
* While browsing through the different photo book template/theme options, you will see at the top of the page three icons that represent the three different orientation options, square, landscape & portrait. 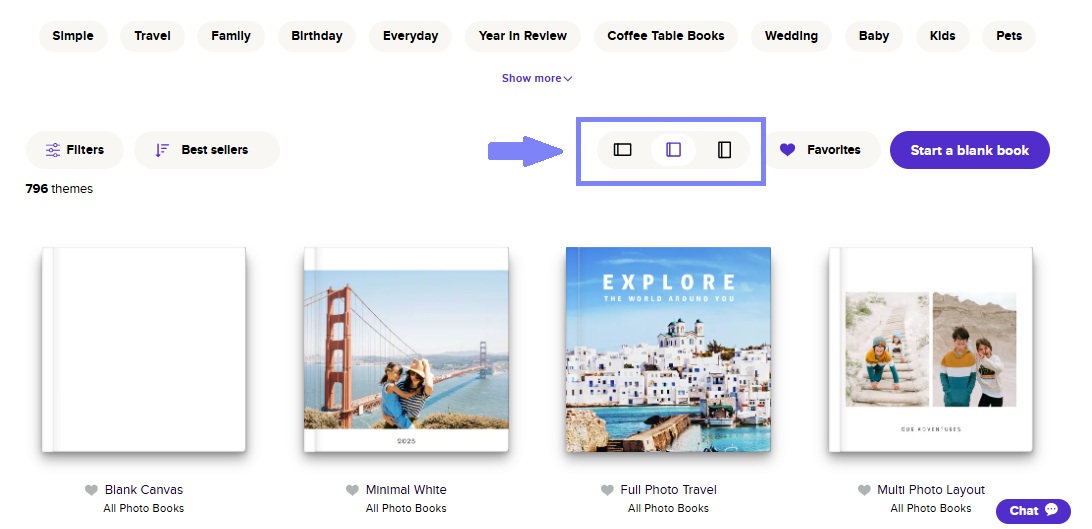
* By clicking on one of the orientation/shape icons the photos of themes being viewed will adjust to reflect the orientation/shape selected
* The orientation selected will carry through into the Mixbook studio & final printed product unless otherwise changed before creation.
In the Preview Page
* Once you've clicked on your template selection you will be brought to the preview screen
* The preview screen, shown below, will appear & the three orientation options (square, landscape & portrait) will appear as icons in the top right corner. Select the orientation/shape you'd like and the preview visual will adjust with what you select.
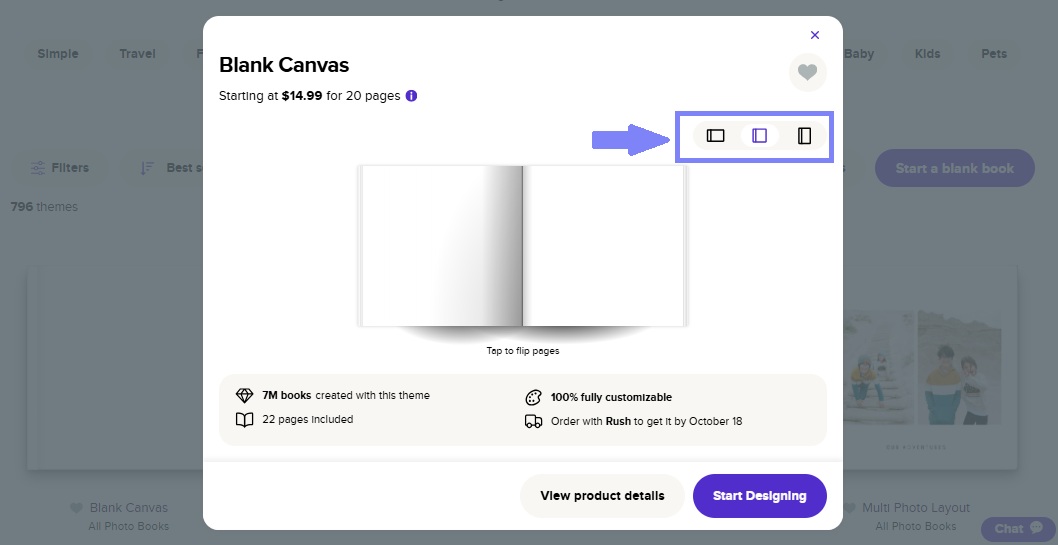
* Once you've selected your orientation, you can click "start designing" & your studio creation experience will reflect the orientation/shape you selected.
In View Product Details Page:
* Once you've clicked on your template selection you will be brought to the preview screen within that screen, click "view product details" below the image of the template
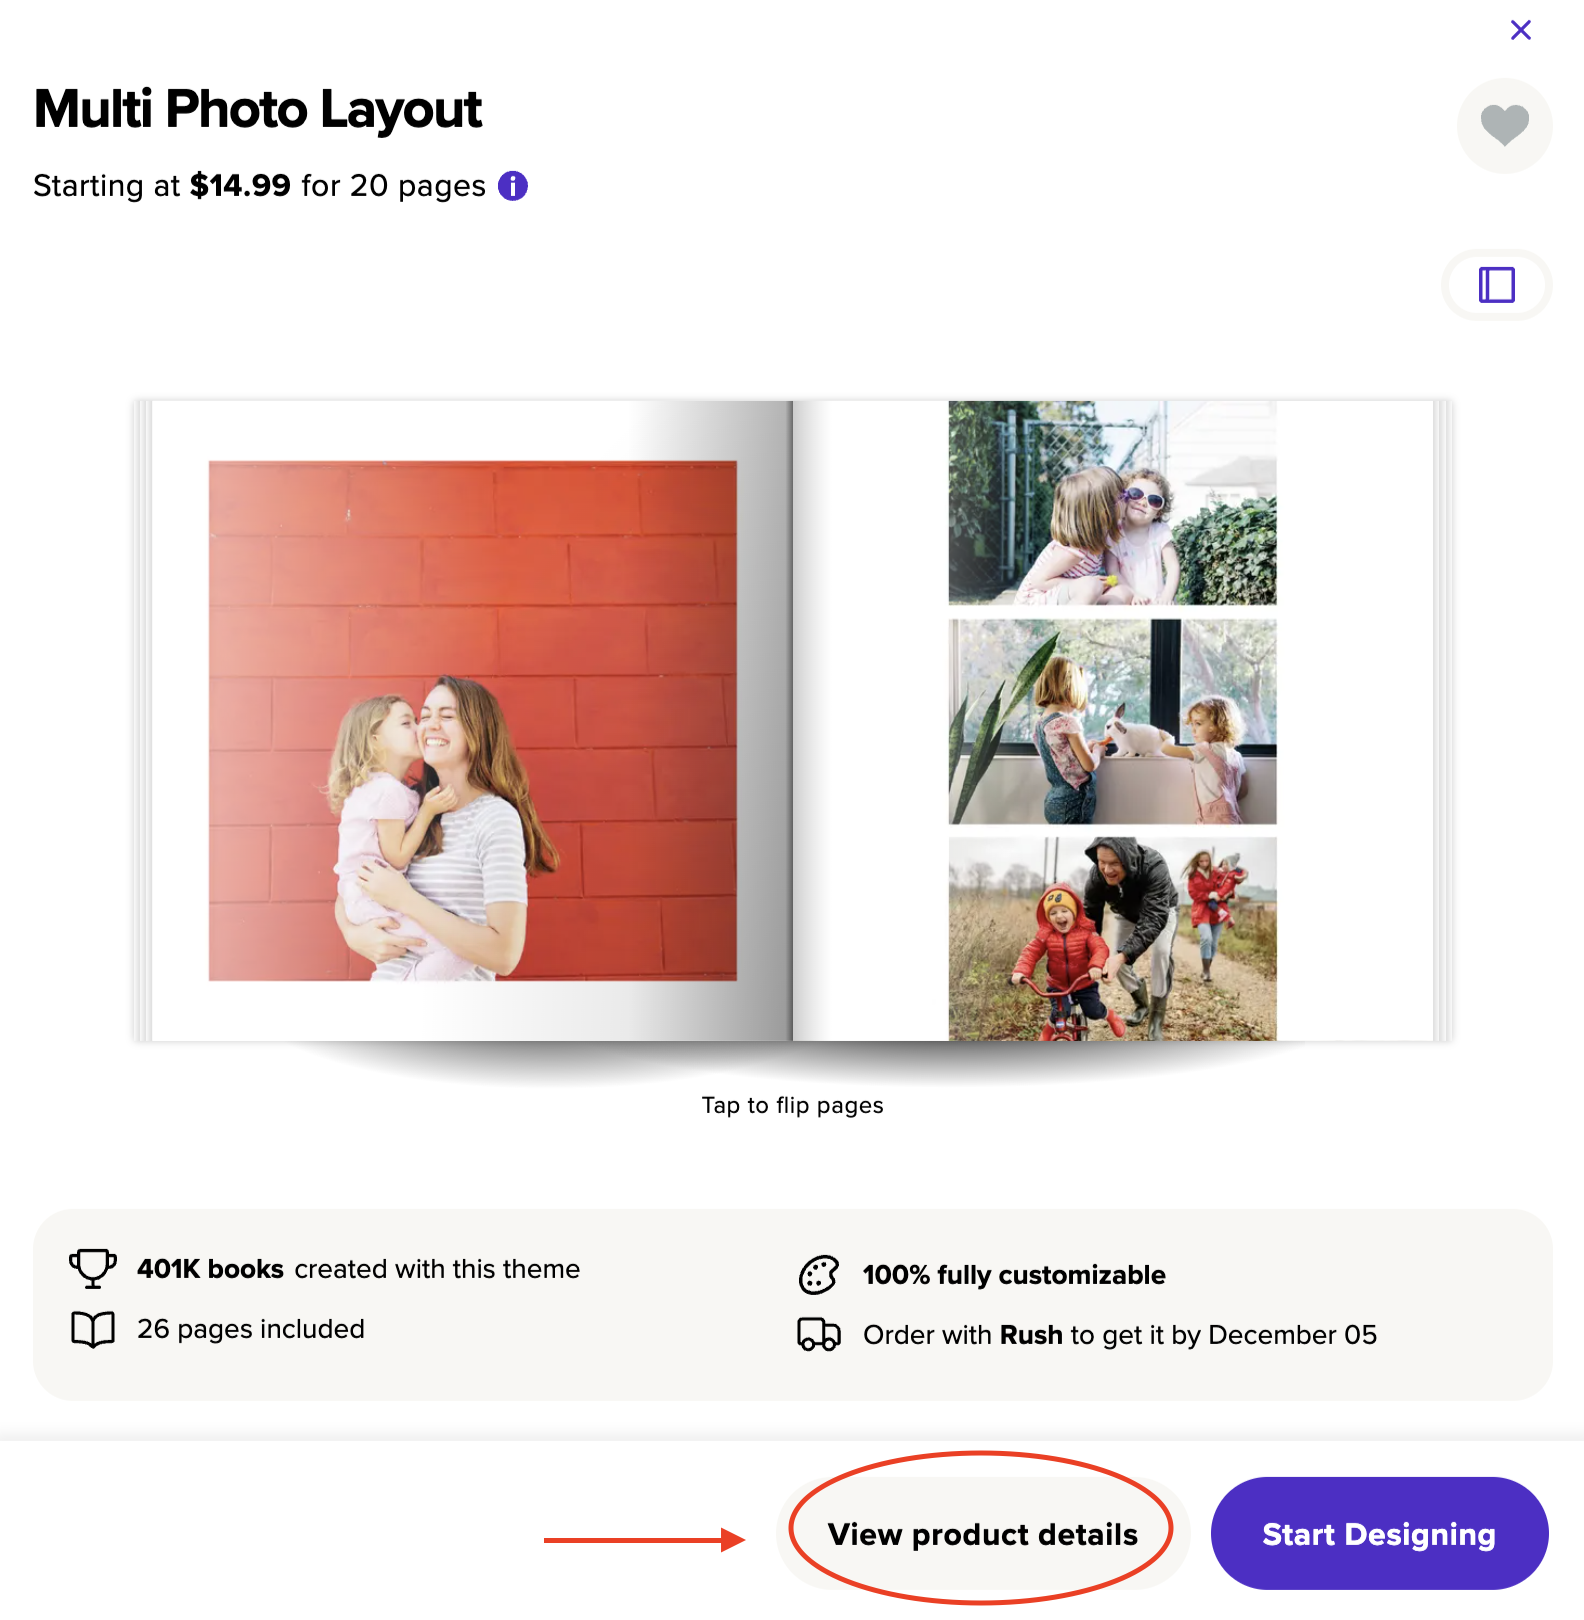
* In the "view product details" screen, you can select all specifications prior to creating your Mixbook (Book/cover type, orientation, size & starting page number (20-60))
Via Mixbook App
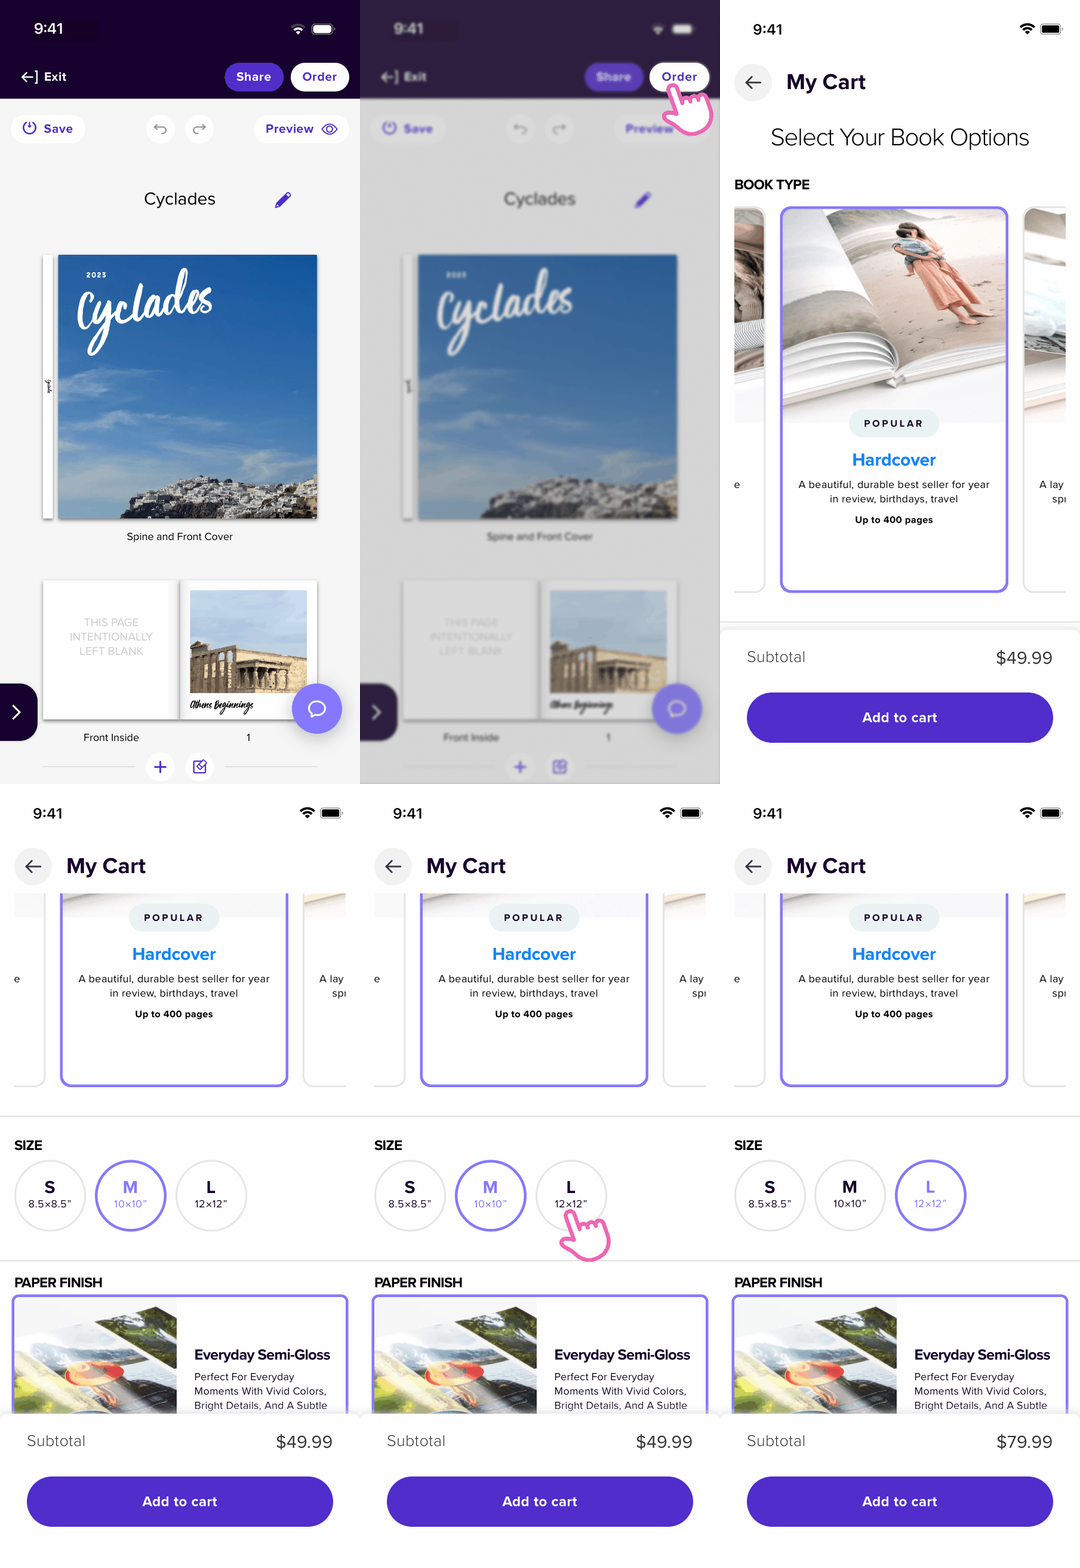
Changing size but not orientation
- You can change the size of the book at checkout.
Changing book orientation
- At this time, you will have to duplicate your project to a different orientation to achieve this.
- Go to “My Projects” page then tap the “three-dot” icon below the project you want to change.
- You will then see “Make a copy” option.
- In the next screen, find the section called “Copy to” and select the orientation you want (Square, Landscape or Portrait).
- To finalize, tap “Copy Project”.
- It is recommended to check each page after doing this as elements will shift when copy a project to a different orientation.