Once your stickers are ready — whether saved or freshly downloaded — you can easily upload them to your sticker library in the Mixbook Studio.
🎥 Watch it in action: See this step in our Mixbook Studio Essentials video tutorial at 07:08 – 08:25 — Adding Stickers.
Steps to Upload Custom Stickers
1. Open your project and select Stickers from the left-hand panel.
2. Choose Upload Stickers.
3. Then click the Upload Stickers button.
4. In the upload window, click Upload Stickers again.
5. Select your files.
- Then click Open to start uploading.
- Tip: For best print quality, a sticker's largest side should be greater than 2400 pixels. For best results, use a transparent PNG file of your sticker.
- Your uploaded stickers will appear under Upload Stickers section in the Stickers tab of the Mixbook Studio.
Steps to Upload Custom Backgrounds
1. Open or start your Mixbook project.
2. Go to the Backgrounds tab on the left panel in the Mixbook Studio.
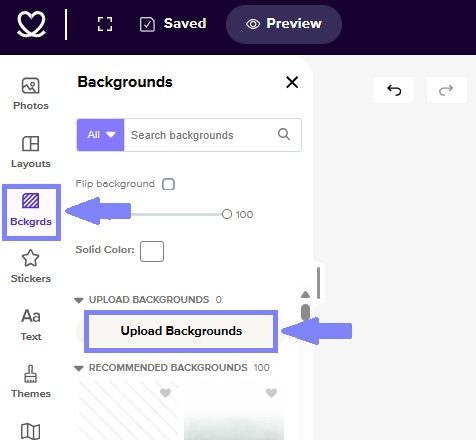
3. Click Upload Backgrounds.
4. The pixel requirements for your project will be displayed—these vary based on book size (landscape, portrait, or square).
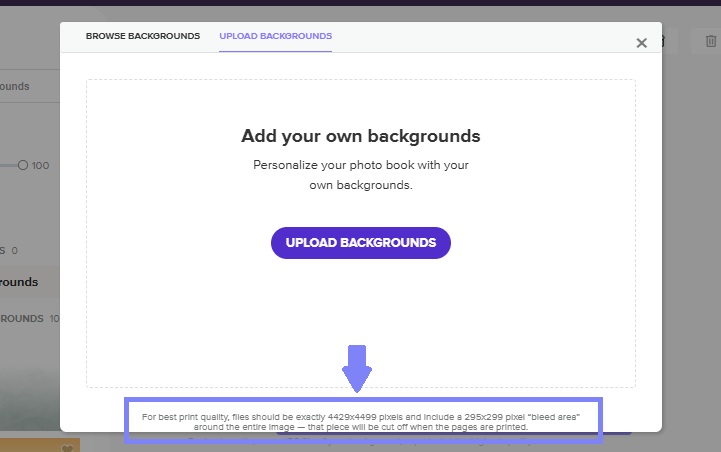
5. Click Upload Backgrounds again and select your pre-made images.
6. Once uploaded, your images will appear in the Upload Backgrounds section.
7. Apply your backgrounds to your pages and start designing.
Want to design your own?
Check out our blog guide: Create your own stickers and backgrounds for your Mixbook (for free!) — it walks you through fun, easy ways to personalize your project with your own artwork and images.